Apple has made the Notes app much more interesting and useful in the latest versions of iOS and iPadOS and added several features. One such feature is the ability to create checklists.
When you create a list in Notes, each list has a check mark next to it that you can use to mark a completed task, which is very convenient.
The steps below will help you build your list. As you know, you can save notes both in iCloud and on your device. Before you start, check where you keep your records.
- To set up Notes with iCloud, go to Settings -> Notes -> Default Account and select iCloud.
- And to set it up on your phone, go to Settings -> Notes and select “On My [device]” Account.
How to create a checklist in notes?
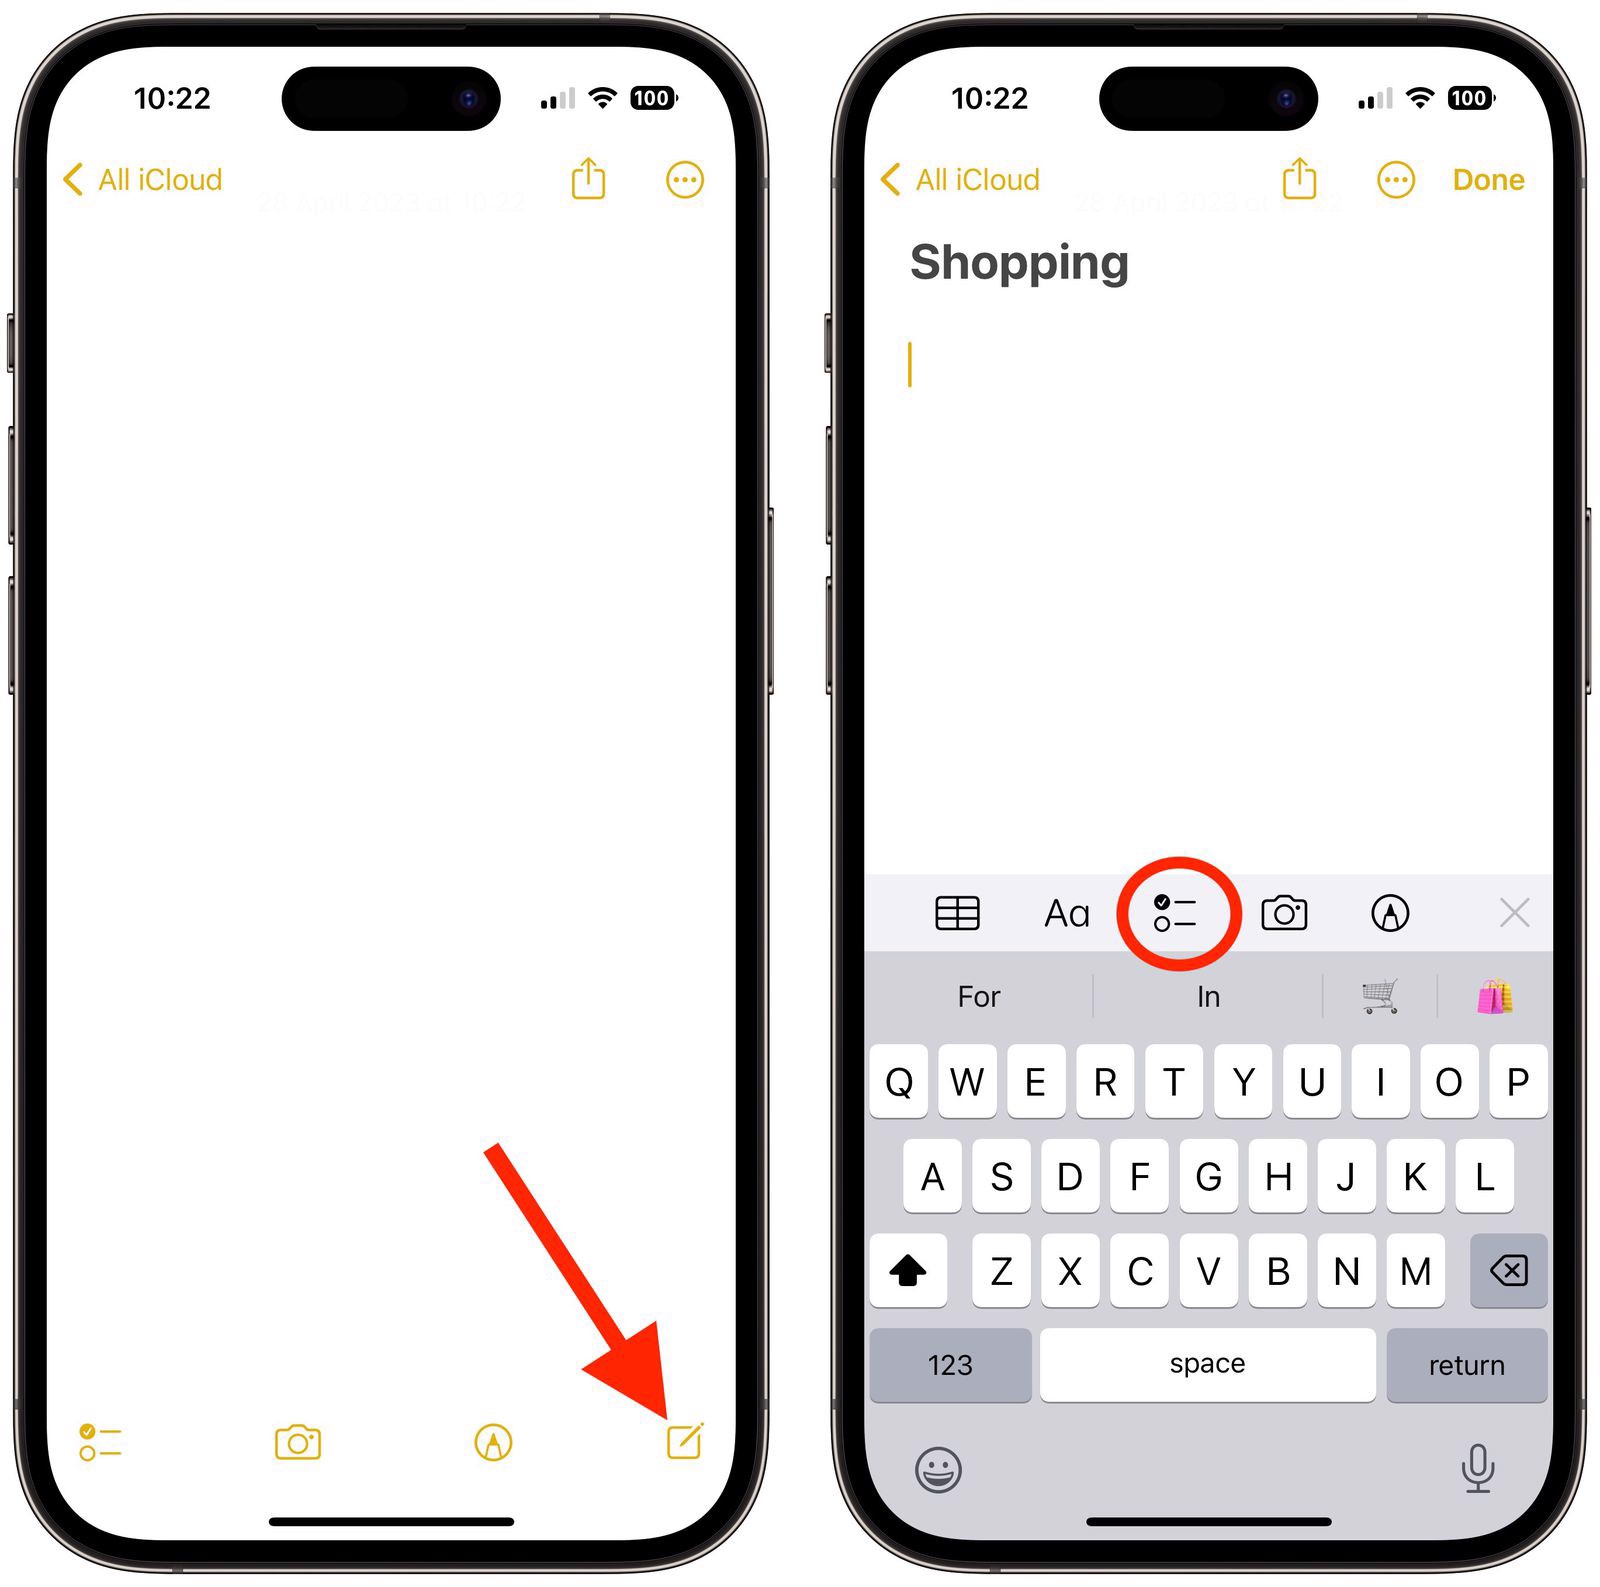
1. Open the Notes app and tap the compose button in the lower right corner of the screen to create a new note.
2. Enter a title
3. Tap the Checklist button on the toolbar to start the checklist.

How to share Checklist?
1. Open the Notes app
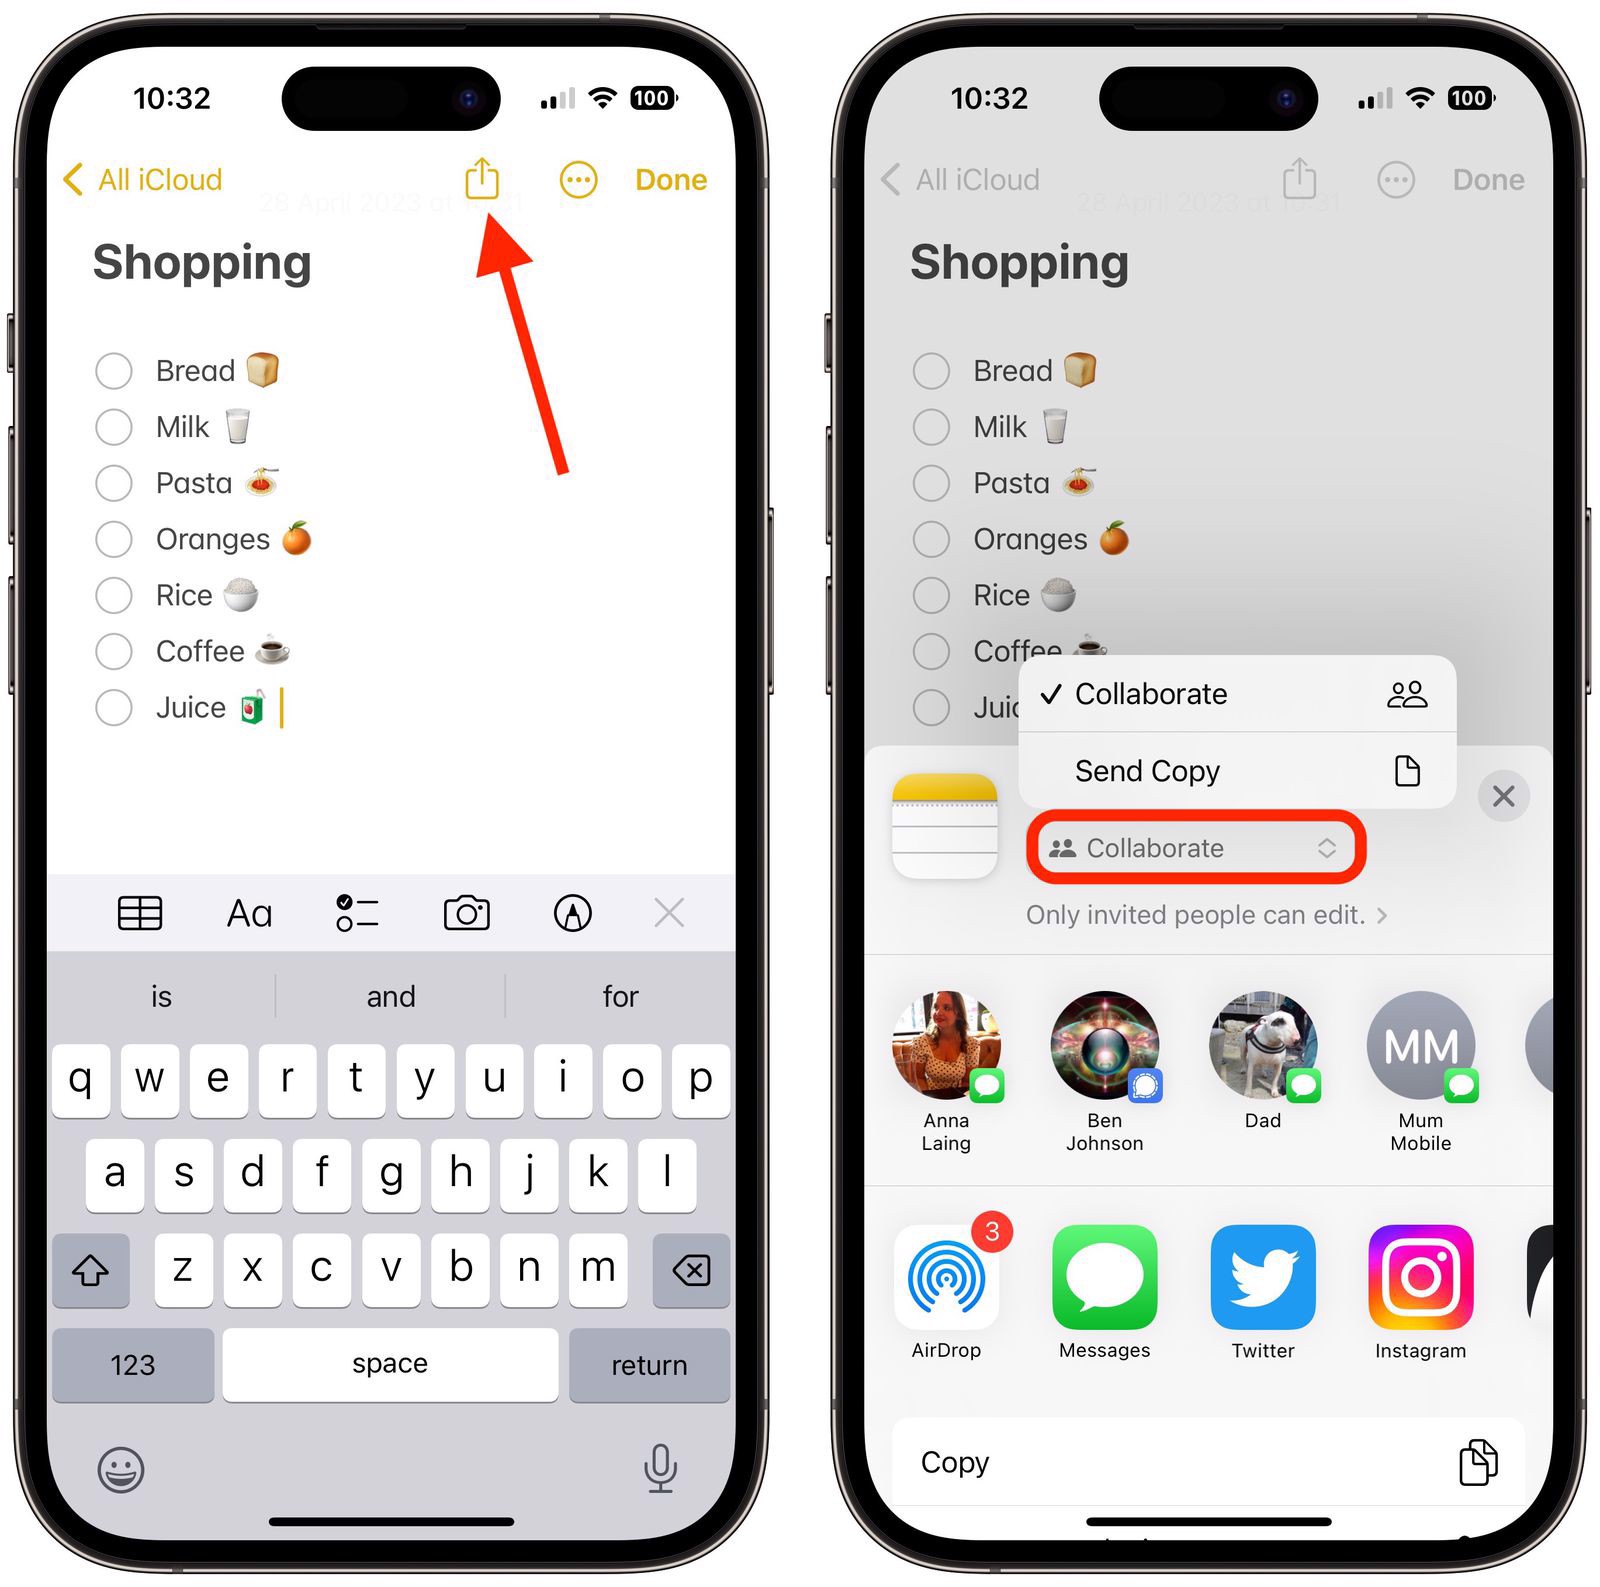
2. Go to Notepads and tap the Share button (the square with the arrow pointing to it)
3. Select Collaborate so others can edit it or just send a copy and choose who you want to send it to


